Transfer files
![]() Applies to: Windows Control
Applies to: Windows Control
Easily transfer files and folders between your device and the end-user's device using 247connect. Drag and drop functionality, along with quick access to navigation and filtering tools, makes organising and transferring your files both flexible and straightforward.
Start a file transfer session
For managed devices
-
Go to Managed in the side menu.
-
Select the device from a device group.
For on-demand sessions
-
Go to On-demand in the side menu.
-
Select the required session.
Click File transfer in the toolbar.
When prompted, click Open to launch the 247connect Control. To skip this step in the future, select Always allow portal.247connect.cloud to open links of this type in the associated app.
By default, connecting to an On-demand Agent requires end-user approval. You can also enable end-user acknowledgement for Managed Agents in Device group settings. While waiting, you'll see a Connecting screen. Click Cancel to stop the request.
The File transfer window appears.
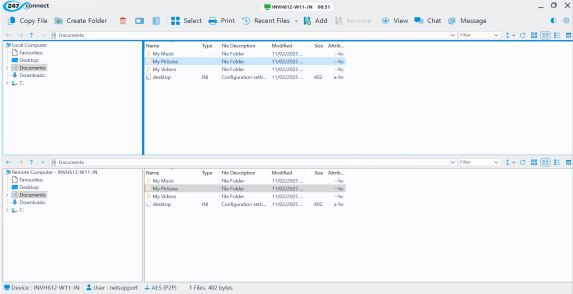
Select and transfer files
-
In the Local Computer pane, navigate to the files or folders you want to transfer. Use the Select drop-down menu to manage your selection:
-
All: Selects all files and folders.
-
Files: Selects all files.
-
Folders: Selects all folders
-
Invert: Reverses the current selection.
-
Clear: Deselects everything.
Note: Click Recent Files to view the last 20 files you worked with. Selecting a file from the list copies it to the current folder on the end-user's device. -
-
In the Remote Computer pane, select the destination folder. If the folder doesn't exist, click Create Folder.
-
Click Copy File.
Note: You can also drag and drop files or folders directly from your device to the end-user's device. -
A Copy Progress dialog shows the status of the transfer. You can:
-
close the window when the transfer finishes
-
hide the main window during the transfer
-
ignore error messages or overwrite prompts until the operation finishes.
-
See also:


