View
![]() Applies to: Windows Control
Applies to: Windows Control
With 247connect, you can easily access and monitor your end users using the View feature.
Start a View session
For managed devices
-
Go to Managed in the side menu.
-
Select the device from a device group.
For on-demand sessions
-
Go to On-demand in the side menu.
-
Select the required session.
Click View in the toolbar.
When prompted, click Open to launch the 247connect Control. To skip this step in the future, select Always allow portal.247connect.cloud to open links of this type in the associated app.
By default, connecting to an On-demand Agent requires end-user approval. You can also enable end-user acknowledgement for Managed Agents in Device group settings. While waiting, you'll see a Connecting screen. Click Cancel to stop the request.
The View window
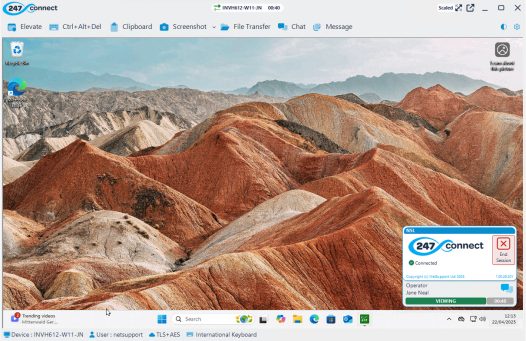
At the top of the window, you'll see the device name and session time. Icons indicate the session type:
|
|
Shows you are in a managed device session. |
|
|
Shows you are in an on-demand session. |
Use the toggle buttons 100%![]() or Scaled
or Scaled![]() to switch between scaled view and 100%. Click the full screen icon
to switch between scaled view and 100%. Click the full screen icon ![]() to enter full-screen mode. Use the on-screen toolbar to access features or return to windowed mode.
to enter full-screen mode. Use the on-screen toolbar to access features or return to windowed mode.

From the View window toolbar, you can:
Enter credentials to elevate the session (available for On-demand Agents only).
Send Ctrl+Alt+Delete.
Blank the end user's screen (available for Windows Managed Agents only).
Choose which monitor to view if the end-user is using multiple monitors or view the whole desktop.
Copy and paste using the clipboard.
Take a screenshot of the end user's screen.
Open a File Transfer window.
Start a chat with the end user.
Send a message to the end user.
Access tools, including PowerShell, Task Manager and Registry Editor.
Change the display theme.
Access the About information for 247connect, the Information Hub and options to download and install updates. When a new version of the Control is available, the icon changes. From here, you can choose to download and install the latest version now or wait until the session ends.
The status bar at the bottom of the window shows the device name, logged-on end user, keyboard layout and the type of encryption the session is using. This will display TLS + AES if the session runs through the gateway or AES (P2P) if the Control and the Agent are on the same network.
Elevate an on-demand remote session
When you are viewing an On-demand Agent, you can elevate the remote session to run admin applications.
Click Elevate in the View window toolbar.
If known, enter the admin user ID and password.
Or
Prompt the end user to enter their credentials.
Click Elevate.
Blank the screen
Blank the screen during a View session to prevent end users from seeing any activity while you work. By default, a message appears on their screen stating that a 247connect user is active. You can
Click Blank in the View window toolbar.
To reinstate the screen, click Blank again.
Capture the screen
Click Screenshot in the View window toolbar.
The end user's screen is captured and saved automatically as a .png file in 247connect/Screenshots folder within your Pictures directory.
Note: An indicator appears on the Screenshot icon, showing the number of screenshots taken (up to nine).Click the Screenshot icon drop-down arrow to view or delete recent screenshots. You can also open the folder where the screenshots are stored.
See also:
Manage Windows Control updates


