Getting started
Before you can use 247connect, an administrator needs to set up and configure the Web Portal so it's ready for users to login and start remote control sessions. When you register, 247connect creates an account using your email address and assigns you the Global Administrator role, giving you full access to all features.
-
Each user can connect to up to 5 devices concurrently.
-
Unlike many competing solutions, 247connect imposes no restrictions on the number of concurrent user sessions. All users can maintain active connections simultaneously without limitation.
Step 1: Log in to 247connect
-
Open your web browser and go to the 247connect login page.
-
Enter your email address and password.
Or
If you registered with an Apple, Google or Microsoft account, click Log in with Apple
 , Log in with Google
  or Log in with Microsoft
  .
. -
Click Log in to access the dashboard.
Step 2: Explore the dashboard
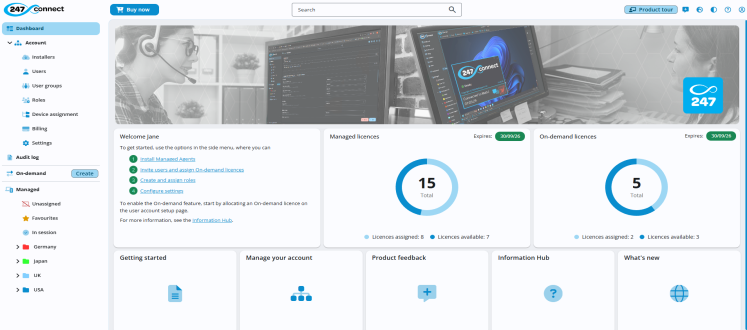
The dashboard gives you an overview of your account, including:
-
-
Links to installers, users, roles and settings.
-
Quick access to resources and account options.
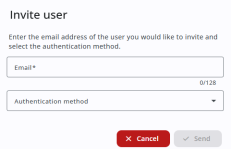
Step 3: Invite users
-
Go to Account > Users and click Invite user.
-
Enter the user's email address, choose the language for the invitation email and select an authentication method.
-
Click Send.
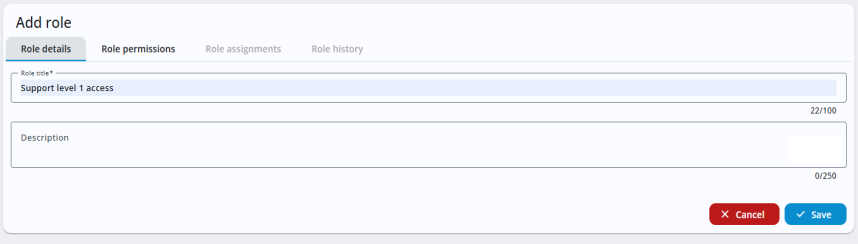
Step 4: Create and assign roles
247connect includes three pre-defined roles, or you can create custom ones.
-
Go to Account > Roles in the side menu.
-
Click Add role to create a role.
-
Select the Role permissions tab to define its permissions.
-
Select the Role assignments tab and click New role assignment to assign the role to users, user groups and device groups.
-
Click Save.
Step 5: Setting up on-demand access
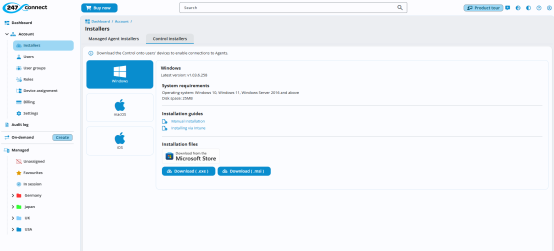
a: Install the Control component
Install the Control (Windows, iOS or macOS) on user devices that will run remote control sessions.
-
Go to Account > Installers in the side menu.
-
Select the Control installers tab.
-
Download the required Control component.
-
Follow the installation instructions for your device.
b: Assign On-demand licences
To enable the On-demand feature, you need to
-
Go to Account > Users in the side menu.
-
Click the Edit
 icon next to the user.
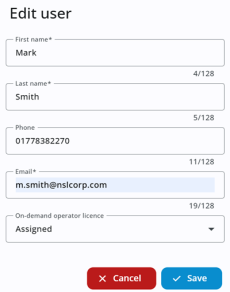
-
From the On-demand
-
Click Save.
Step 6: Setting up managed devices
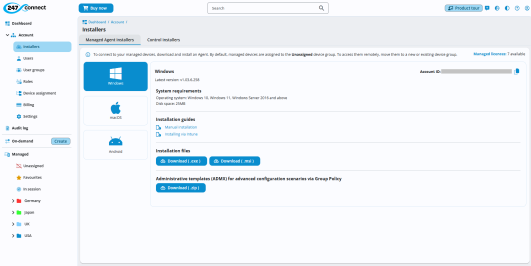
a: Install the Managed Agent and Control components
Install the Managed Agent on your managed devices (available for Windows, Android and macOS). Install the Control on user machines that will run remote control sessions (available for Windows, iOS and macOS).
-
Go to Account > Installers in the side menu.
-
Select the Control installers tab and download the required Control component.
-
Select the Managed Agent installers tab and download the required Managed Agent.
-
Follow the installation instructions for your device.
b: Move your managed devices to a device group
By default, managed devices are added to the Unassigned device group. To access them remotely, move them to a device group.
-
Go to Managed > Unassigned in the side menu.
-
Click the Move
 icon and choose the device group from the list.
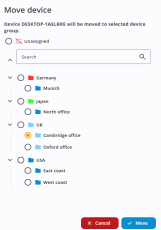
-
Click Move.
Step 7: Manage licences
You can check your
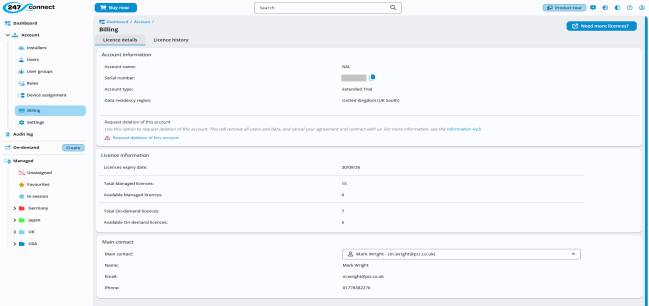
-
View how many Managed device and On-demand
-
Check your
-
Click Need more
Step 8: Configure account settings
You can
-
Go to Account > Settings in the side menu.
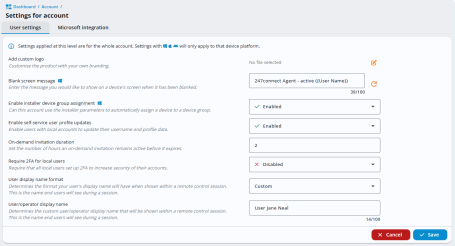
-
Set the required settings.
-
Click Save.
To start a remote control session, see the On-demand and Managed devices sections for more details.
See also:


