Install the Windows Control
The Windows Control is the component you use to connect with your Agents. This needs to be installed on users' machines that need to interact with Agents.
A device with the Windows Control installed can be set up individually or deployed across multiple devices using Group Policy or a third-party deployment tool.
If you use Microsoft Intune to manage your Windows deployments, please see Deploying the 247connect Control using Microsoft Intune for more details.
System requirements
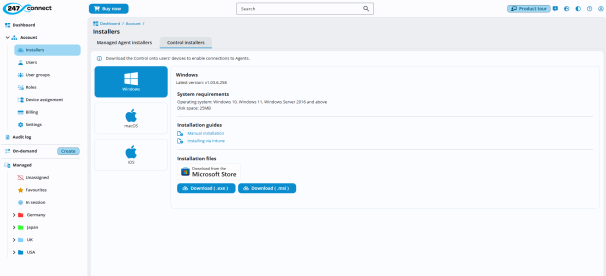
Operating system: Windows 10, Windows 11, Windows Server 2016 or above.
Disk space: 25MB
Run the 247connect Control installer on a local device
-
Go to Account > Installers in the side menu.
-
Select the Control installers tab.
-
Click Windows.
-
Choose an installation file:
-
.exe: Use this for a standard installation on a local device.
-
.msi: Use this if deploying via Group Policy or a deployment tool.
Note: You can install the Control directly from the Microsoft Store. When deploying via Intune, this method has the added benefit of enabling the app to automatically update when a new version is released. For full instructions, see the technical article How to deploy the 247connect Windows Control Microsoft Store app listing via Intune. -
-
The installer file downloads to the device.
-
Open the downloaded installer and follow the on-screen instructions to complete the installation. The 247connect Windows Control is now installed on the local device. (If you downloaded the .msi file, you can use it to create a deployment package with your preferred tool.)
See also:
Deploy the Windows Control using Microsoft Intune
Deploy the Windows Control via Group Policy
Install the Windows Managed Agent
Manage Windows Control updates


