Deploy the Android Managed Agent using the Google Admin Console
You can deploy the 247connect Android Managed Agent and its configuration settings to managed Android devices using the Google Admin Console.
Before you start, make sure:
-
your Android devices are enrolled in the Google Admin Console
-
the required
Add the 247connect Agent app to your App list
-
Sign in to your Google Admin Console.
-
From the Admin Console Home page, go to Apps > Web and mobile apps.
-
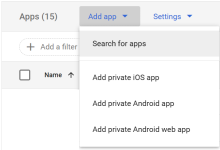
Click Add app > Search for apps.
-
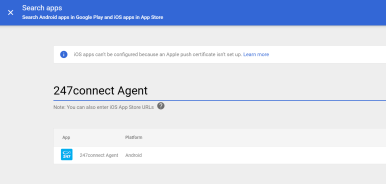
Search for the 247connect Agent.
-
When the app appears, click Select.
-
Choose the required OU level and click Select.
-
Click Continue.
-
Set the app to Force install on managed devices and click Finish.
You now need to associate the required 247connect configuration settings with the app.
Create the 247connect configuration
This configuration ensures that each device links to the correct 247connect account.
-
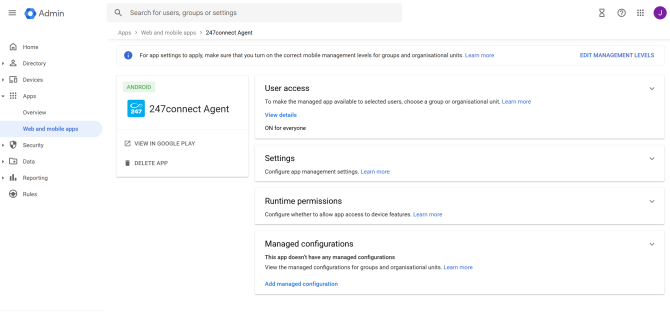
In the Web and mobile apps list, select the 247connect Agent app.
-
Click Managed configurations.
-
Click Add managed configuration.
-
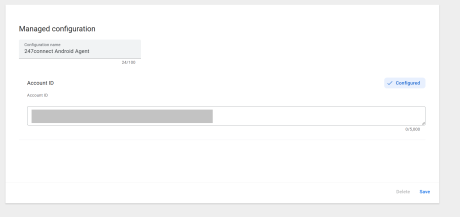
When prompted, enter the account ID shown in the Installers section of the 247connect Web Portal.
-
Enter a configuration name.
-
Copy and paste the account ID from the 247connect Web Portal.
-
Click Save.
Apply the managed configuration to the required Organisational Unit
-
Click Settings.
-
In the left-hand panel, select the OU where you want to apply the configuration.
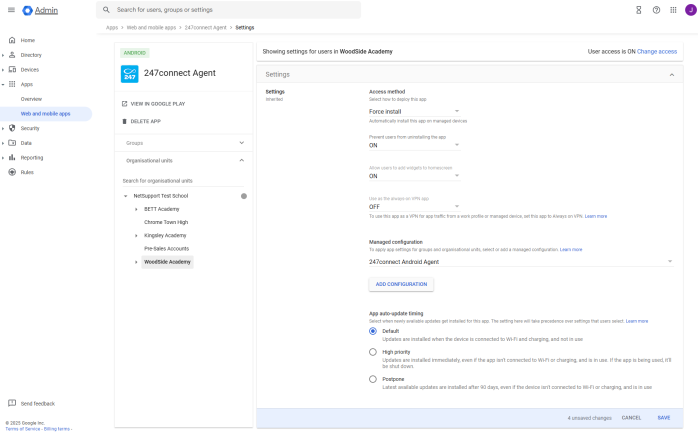
-
Ensure the Access method is set to Force install.
-
Set Prevent users from uninstalling the app to On.
-
Choose the required managed configuration from the drop-down list. You can also add a new configuration here if needed.
-
Click Save.
The 247connect Agent app will now deploy automatically on the selected devices with the correct configuration settings.
See also:
Install the Android Managed Agent
Deploy the Android Managed Agent using Microsoft Intune


