View
![]() Applies to: macOS Control
Applies to: macOS Control
With 247connect, you can easily access and monitor your end users using the View feature.
Start a View session
For managed devices
-
Go to Managed in the side menu.
-
Select the device from a device group.
For on-demand sessions
-
Go to On-demand in the side menu.
-
Select the required session.
Click View in the toolbar.
When you open the Web Portal in Safari, a prompt appears asking you to allow the 247connect macOS Control to open. Click Allow to continue.
Sign in to your 247connect account when prompted.
By default, connecting to an On-demand Agent requires end-user approval. You can also enable end-user acknowledgement for Managed Agents in Device group settings. While waiting, you'll see a Connecting screen. Click Cancel to stop the request.
The View window
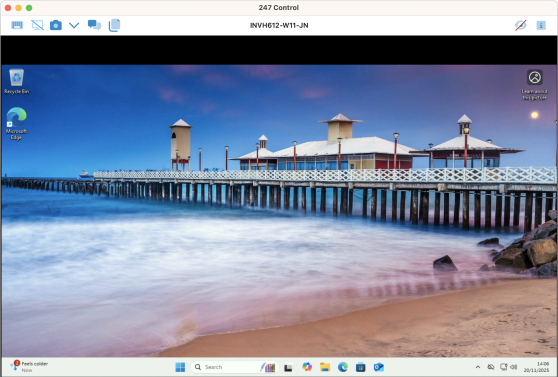
From the View window toolbar, you can:
-
Send Ctrl+Alt+Delete.
-
Blank the end user's screen (Windows Managed Agents only).
-
Choose which monitor to view if the end user is using multiple monitors.
-
Take a screenshot of the end user's screen.
-
Start a chat with the end user.
-
Send a message to the end user.
-
See the device name.
-
Stop viewing the end user.
-
Access the About information and the Information Hub.
Blank the screen
Blank the screen during a View session to prevent end users from seeing any activity while you work. By default, a message appears on their screen stating that a 247connect user is active. You can
-
Click the Blank
 icon in the View window toolbar.
 -
To reinstate the screen, click the Blank
icon again.
Capture the screen
-
Click the Screenshot
 icon in the View window toolbar.
 -
The end user's screen is captured and saved automatically as a .png file in the 247connect Screenshots folder inside your Pictures folder.
Note: An indicator appears on the Screenshot icon, showing the number of screenshots taken (up to nine). -
Click the Drop-down
 icon to open the folder where the screenshots are stored.
See also:


