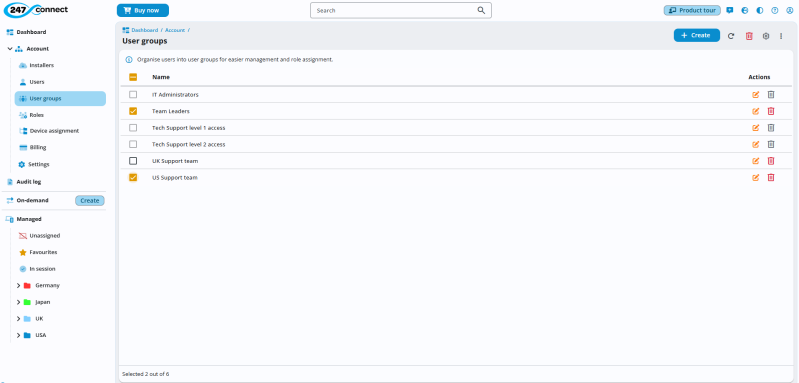
User groups
User groups enable you to manage access for multiple users at once. A group can have one or more roles and every member automatically inherits those roles. This makes it easy to assign the same permissions to several users. A user can also belong to multiple groups.
You can sort the table by clicking a column header. Click again to change the sort direction. An arrow icon next to the column header indicates the current sort direction.
You can ![]() icon at the top of the display area. In the Manage columns pane, remove a column by clicking the close
icon at the top of the display area. In the Manage columns pane, remove a column by clicking the close ![]() icon or drag and drop column names to reorder them, then click Save.
icon or drag and drop column names to reorder them, then click Save.
You can export the table to a PDF or .CSV file. Click the three dots icon ![]() at the top right of the display area, then select Export to PDF or Export to CSV. The file is saved in your Downloads folder.
at the top right of the display area, then select Export to PDF or Export to CSV. The file is saved in your Downloads folder.
Create a user group
-
Go to Account > User groups in the side menu.
-
Click Create.
-
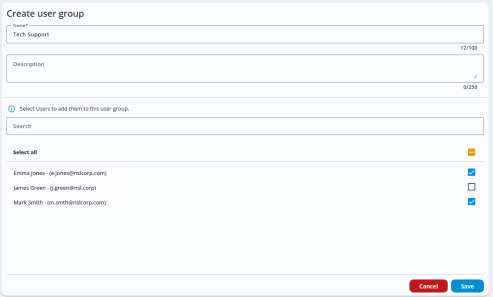
Enter a name for the group and, if required, a description.
-
Select the users to add to the group. You can use the search bar to find users.
-
Click Save.
-
The new group appears in the list.
Once created, you can assign roles to the group.
Manage user groups
-
Click the Edit icon to update the group and its members.
-
Click the Delete
 icon to remove a group.Note: You can't delete a group that has users or roles assigned to it.
View details of a user group
-
Click the required group in the list.
The User groups page has three tabs:
Members
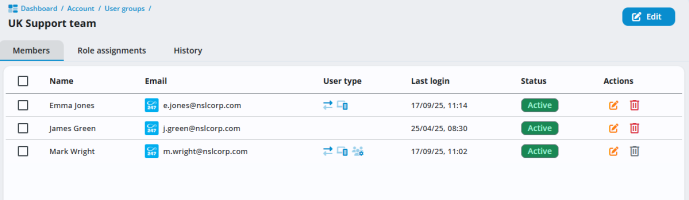
Displays the users in the group. You can edit or delete users from the group here. Clicking a user opens their user details page.
Role assignments
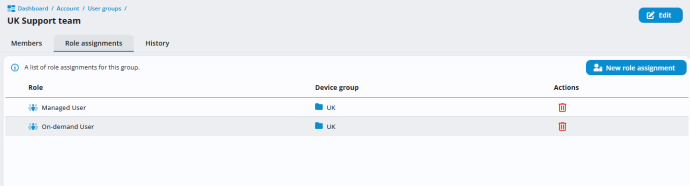
Shows the roles assigned to the group and the associated device group. To create a new role assignment, click New role assignment. To edit a role assignment, click the role assignment and update the associated device groups.
If you delete the role, it also removes it from the device group.
History
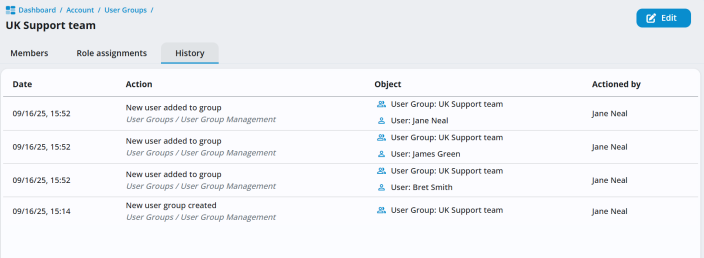
Shows all events related to the user group.
See also:
Manage individual user details