Manage individual user details
Manage the details of any user selected from the Users list. You can view and edit their personal information and assigned roles.
Open a user's details
-
Go to Account > Users in the side menu.
-
Click the required user from the list.
The User page has four tabs:
User details
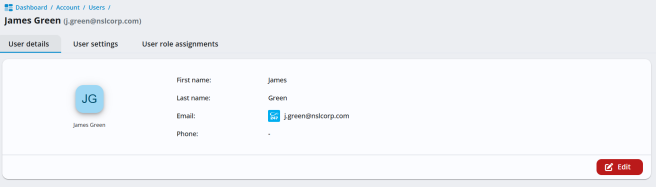
Displays the user's name, email address, contact details and shows if two-factor authentication (2FA) is enabled. (If you have the required permissions, you can disable 2FA for the user here.) Click Edit to update their details.
User settings (coming soon)
User role assignments
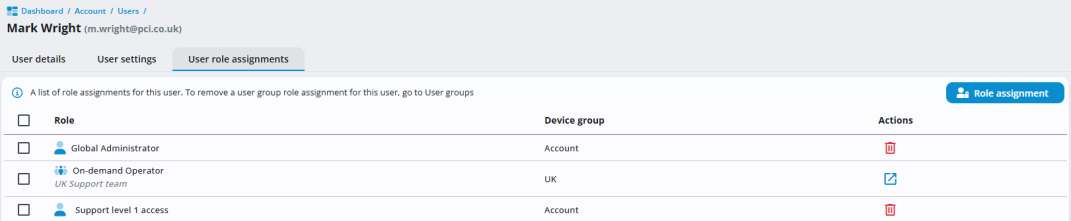
Shows the roles assigned to the user and the device groups where those roles apply.
To create a new role assignment, click New role assignment. To edit a role assignment, click the role assignment and update the associated device groups. Remove a role by clicking the Delete
 icon. To delete a user group role assignment, click the Go to user group
  icon.
icon. The role icon indicates how the role is assigned:
 [Single person icon]
The role is assigned by user.  [Multiple person icon]
The role is assigned via a user group. User history
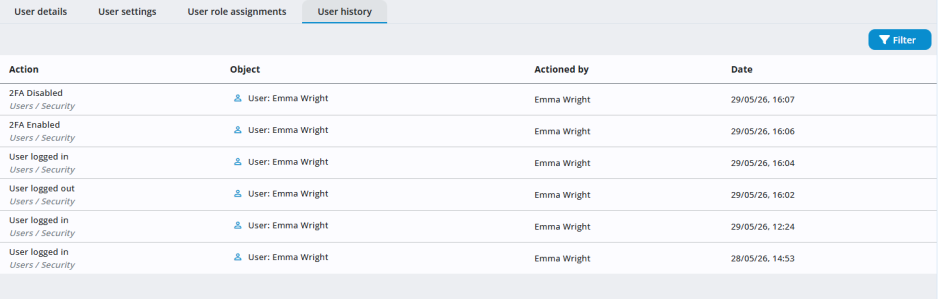
Displays a chronological record of activity and changes for the selected user.
See also:
Setting up two-factor authentication (2FA)


