Integrate 247connect with Salesforce
Salesforce is a customer relationship management (CRM) platform used to manage customer cases, service requests and support workflows.
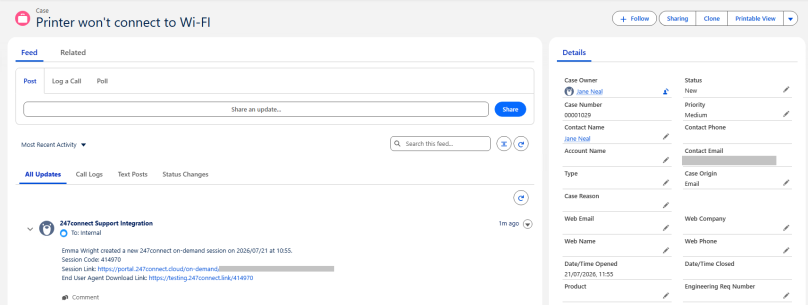
You can integrate Salesforce with 247connect to launch an on-demand session directly from a Salesforce Case and automatically create Case Feed Items when an on-demand session starts and ends.
You can configure one or both parts of the integration:
-
Create an on-demand session button in a Case (required)
-
Enable session updates from 247connect to Salesforce (optional)
Configure Salesforce to launch 247connect on-demand sessions
Step 1 – Create the Case button
-
In Salesforce, click the Setup
 icon in the top-right corner.
 -
Select Setup.
-
Go to Object Manager.
-
In Quick Find, search for Case.
-
Select Case.
-
Select Buttons, Links, and Actions.
-
Click New Button or Link.
-
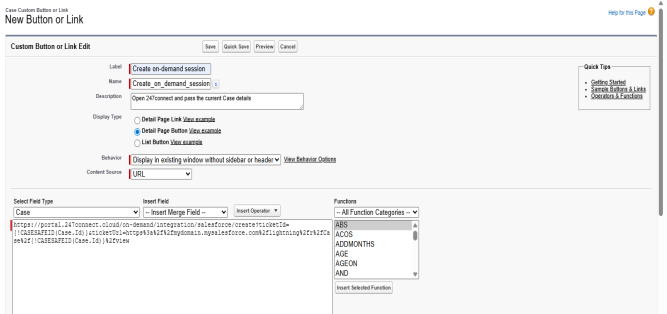
Configure the following settings:
Label: Create on-demand session
Name: Automatically generated
Description: Open 247connect and pass the current Case details
Display Type: Detail Page Button
Behavior: Display in existing window without sidebar or header
Content Source: URL
Enter the following URL:
Copyhttps://portal.247connect.cloud/on-demand/integration/salesforce/create?ticketId={!CASESAFEID(Case.Id)}&ticketUrl=https%3a%2f%2fmydomain.mysalesforce.com%2flightning%2fr%2fCase%2f{!CASESAFEID(Case.Id)}%2fviewReplace mydomain.mysalesforce.com with your Salesforce My Domain URL. You can find this in Setup > Company Settings > My Domain. Make a note of your Current My Domain URL, as you'll use this later when configuring the integration in the 247connect Web Portal.
Important! Do not modify any other part of the URL. -
Click Check Syntax, then Save.
Step 2 – Add the button to the Case page layout
-
Go to Object Manager > Case > Case Page Layouts.
-
Select Case Layout.
-
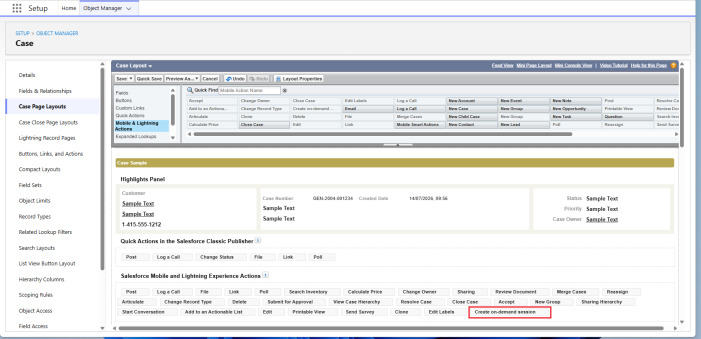
Scroll to Salesforce Mobile and Lightning Experience Actions.
-
Click the Wrench
 icon to override the default actions.
 -
From the palette, select Mobile & Lightning Actions.
-
Drag Create on-demand session into the Salesforce Mobile and Lightning Experience Actions section.
-
Click Save.
After you add the button to the Case page layout, it becomes available from the Actions menu on Salesforce Case records.
Configure Salesforce session updates from 247connect
Step 1 – Create a permission set
-
In Salesforce, open Setup.
-
In Quick Find, search for Permission Sets.
-
Select Permission Sets.
-
Click New.
-
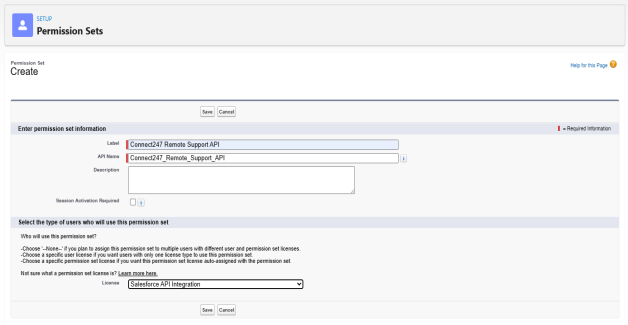
Configure the following settings:
Label: Connect247 Remote Support API
License: Salesforce API Integration
-
Click Save.
-
Under Apps, click Object Settings.
-
Select Cases.
-
Click Edit.
-
Enable the following object permissions:
-
Read
-
View All Records
-
-
Click Save.
Step 2 – Create an integration user
-
In Quick Find, search for Users.
-
Select Users.
-
Click New User.
-
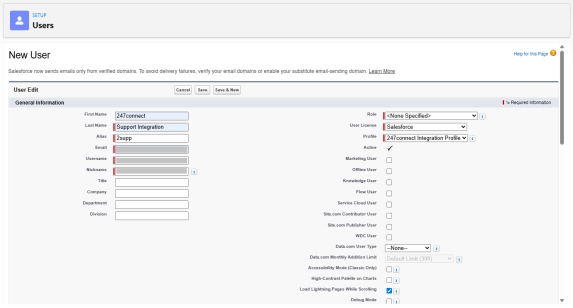
Configure the following settings:
First Name: 247connect
Last Name: Support Integration
Email: Enter the required email address
Username: Any unique email-format username (this is automatically populated with your email address when you click on the field).
User License: Salesforce Integration
Profile: Minimum Access - API Only Integrations
Note: The Alias and Nickname fields are automatically generated. -
Make a note of your username as you'll need it later.
-
Click Save.
-
Salesforce sends a verification email. Follow the instructions in the email to verify the integration user.
-
Once the user has been verified, assign the permission set.
-
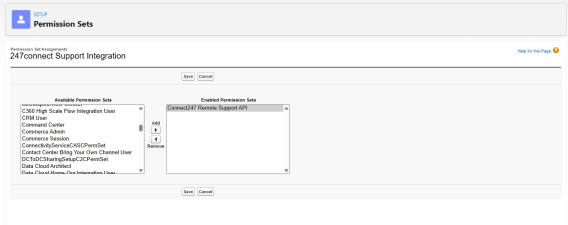
Scroll to Permission Set Assignments.
-
Click Edit Assignments.
-
Move Connect247 Remote Support API to Enabled Permission Sets.
-
Click Save.
This automatically adds the Salesforce API Integration permission set
Step 3 – Create the External Client App
-
In Quick Find, search for External Client App Manager.
-
Select External Client App Manager.
-
Click New External Client App.
-
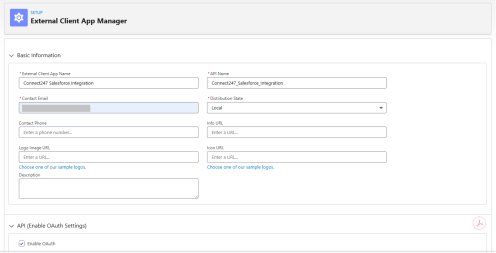
Enter the following settings:
External Client App Name: Connect247 Salesforce Integration
Contact Email: Enter the required email address
-
Open the API (Enable OAuth Settings) section and select Enable OAuth.
-
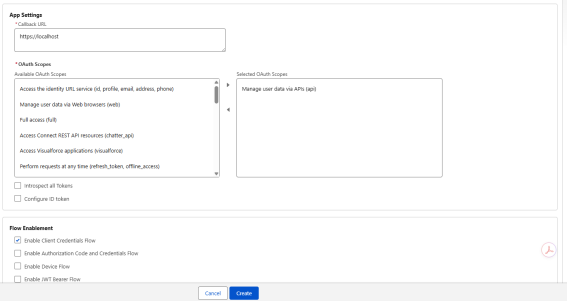
Under Callback URL, enter https://localhost.
-
Under OAuth Scope, move Manage user data via APIs (api) to Selected OAuth Scope.
-
Under Flow Enablement, select Enable Client Credentials Flow.
-
Click OK.
-
Click Create.
Now you need to configure the OAuth policies.
-
In the External Client App, select Policies.
-
Click Edit.
-
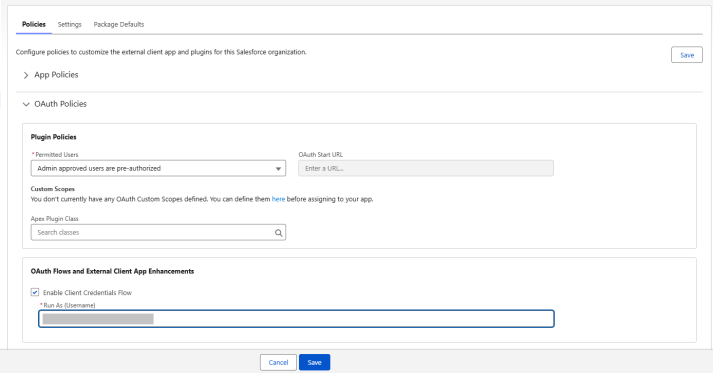
Open OAuth Policies. Set Permitted Users to Admin approved users are pre-authorized and click OK.
-
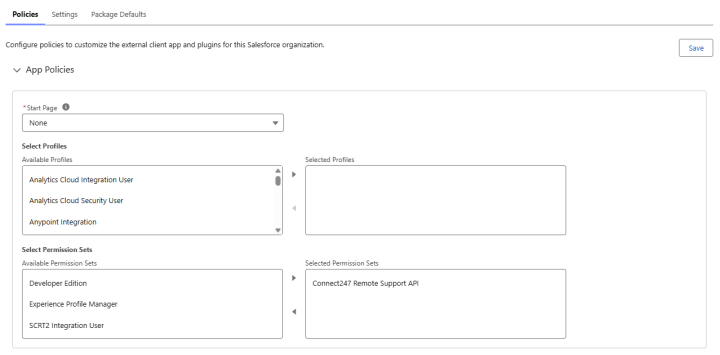
Open App Policies. Under Select Permission Sets, move Connect247 Remote Support API to Selected Permission Sets.
-
Scroll to OAuth Flows and External Client App Enhancements and select Enable Client Credentials Flow.
-
Set Run As (Username) to the integration user you created earlier.
-
Click Save.
Step 4 – Copy the Consumer Key and Consumer Secret
-
In the External Client App, select Settings.
-
Open OAuth Settings.
-
Click Consumer Key and Secret.
-
Verify your identity if prompted.

-
Copy:
-
Consumer Key
-
Consumer Secret
-
You'll need these values when configuring 247connect.
Step 5 – Configure the integration in 247connect
-
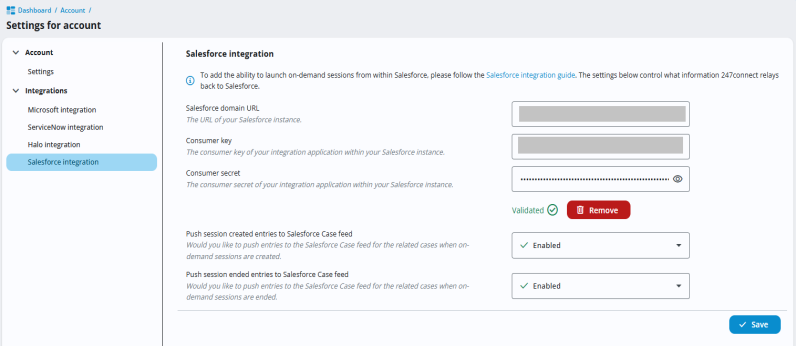
In the 247connect Web Portal, go to Account > Settings > Integrations > Salesforce integration.
-
Enter the following:
-
Salesforce domain URL
Note: This is your Current My Domain URL. You can find it in Salesforce under Setup > Company Settings > My Domain. -
Consumer key
-
Consumer secret
-
-
To check the connection and confirm that the credentials are correct, click Validate.
Note: You can also control which session entries 247connect sends to Salesforce from here. -
Click Save.
Start an on-demand session from Salesforce
After setup, you can create a 247connect on-demand session directly from a Salesforce Case.
Start a session
-
Open a Case in Salesforce.
-
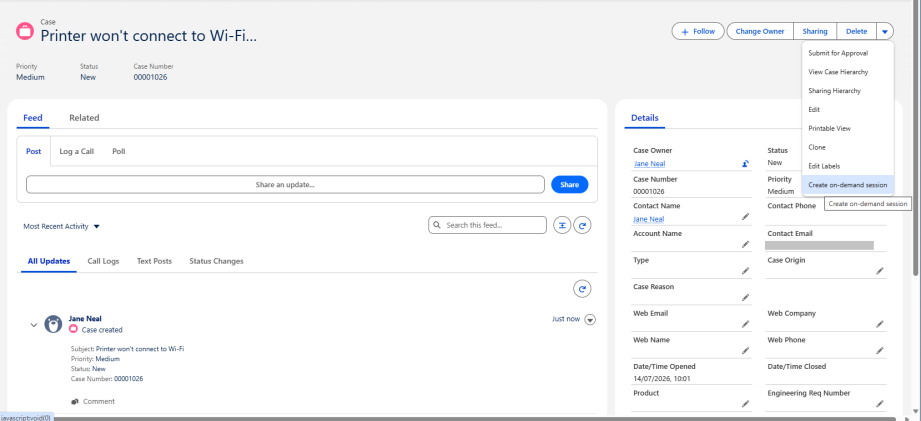
From the Actions menu, select Create on-demand session.
-
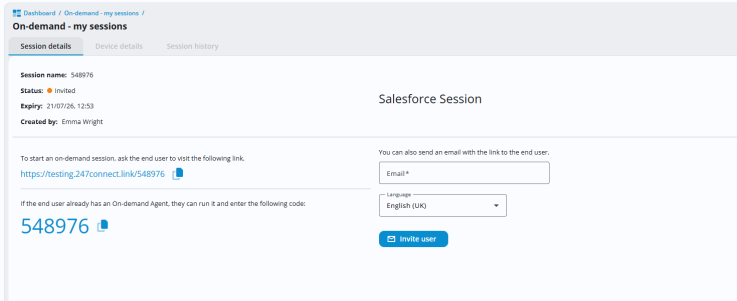
The 247connect Web Portal opens.
-
An on-demand session is created automatically.
-
Start the on-demand session with the end user.
-
When you finish the session, you are automatically redirected to Salesforce.
-
If session updates are enabled, 247connect automatically adds Case Feed Items when the session starts and ends.