Integrate 247connect with HaloITSM
HaloITSM is an IT service management (ITSM) platform used to manage incidents, service requests and support workflows.
You can integrate 247connect with HaloITSM to launch on-demand sessions directly from HaloITSM tickets and optionally send session information back to HaloITSM.
You can configure one or both parts of the integration:
-
Create an on-demand session action in HaloITSM (recommended).
-
Enable session updates from 247connect to HaloITSM (optional).
Create an on-demand session action in HaloITSM
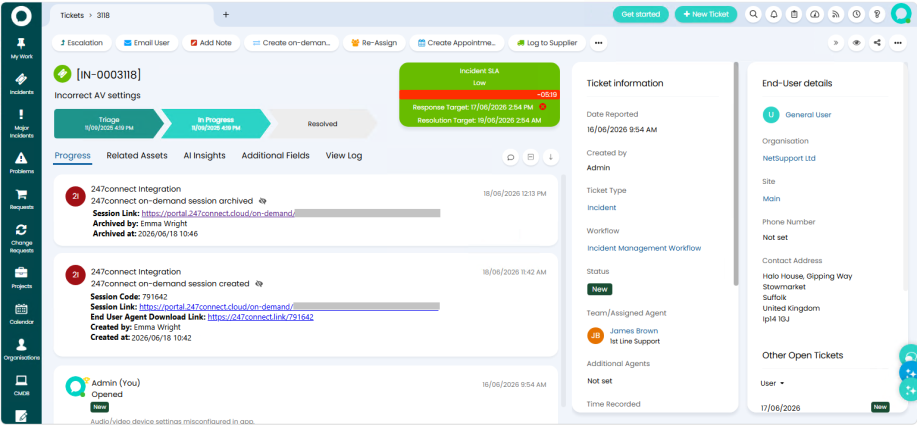
This configuration adds a Create on-demand session action to HaloITSM tickets that launches 247connect and creates an on-demand session.
Step 1 - Create the ticket action
-
In HaloITSM, go to Configuration > Tickets > Actions.
-
Click New.
-
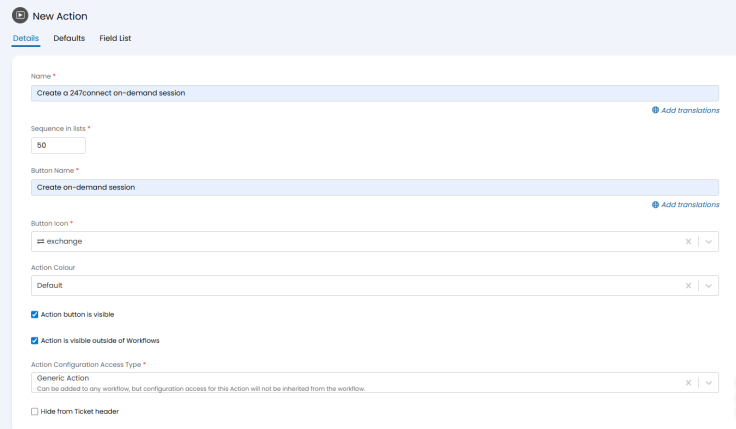
On the Details tab, configure the following settings:
Name: Create a 247connect on-demand session
Sequence in lists: A value of your choice, for example, 1
Button Name: Create on-demand session
Button Icon: Optional. Select a button icon, such as exchange, if required
Action Colour: Optional. To use the 247connect
-
Scroll to Action Settings.
-
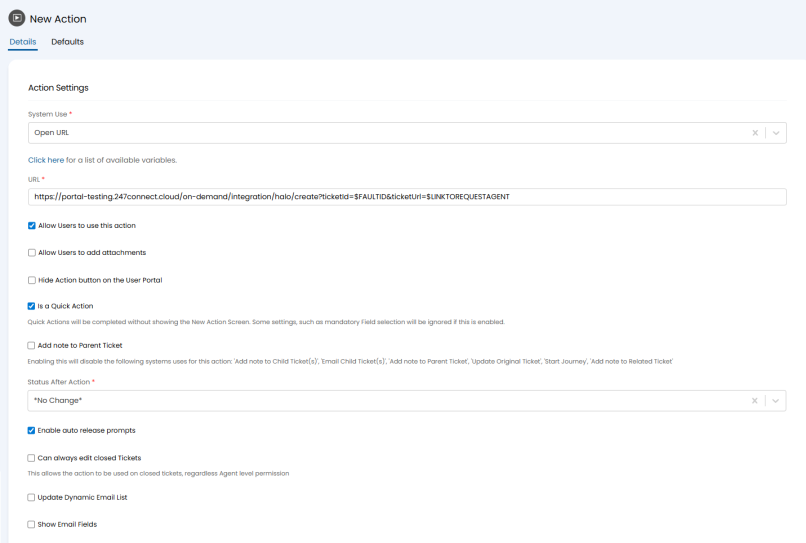
Configure the following settings:
System Use: Open URL
URL: https://portal.247connect.cloud/on-demand/integration/halo/create?ticketId=$FAULTID&ticketUrl=$LINKTOREQUESTAGENT
Allow Users to use this action: Enabled
Is a Quick Action: Enabled
Show Email Fields: Disabled
-
Select the Defaults tab.
-
Configure the following settings:
Hide from user: Enabled
Hide action from conversation & internal: Enabled
Charge Rate will override Ticket default: Disabled
-
Click Save.
Note: HaloITSM does not automatically save configuration changes. Ensure you click Save before leaving the page, otherwise your changes may be lost.
The ticket action is now created.
Step 2 - Add the action to a workflow
-
Go to Configuration > Tickets > Workflows.
-
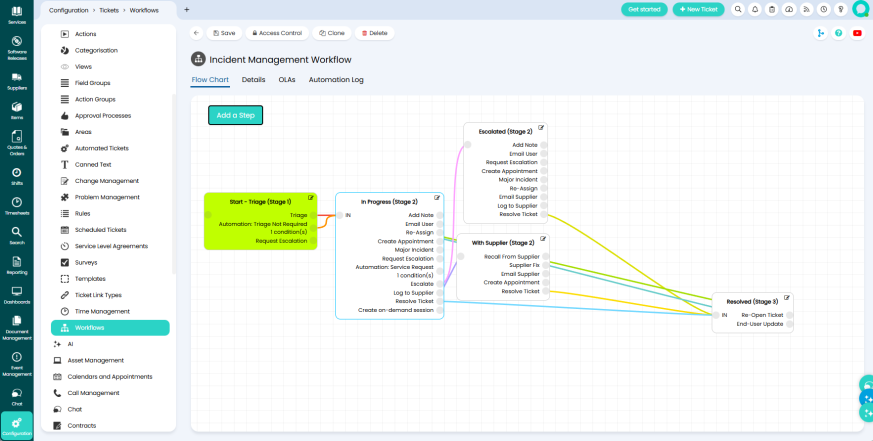
Open the workflow where users should be able to create on-demand sessions, for example, the Incident Management Workflow.
-
Click Edit.
Note: Workflows can be -
Click the workflow stage where users should be able to create on-demand sessions, for example, In Progress (Stage 2).
-
Click the Edit
 icon in the top-right corner of the stage configuration window.
 -
In the Actions section, click Add.
-
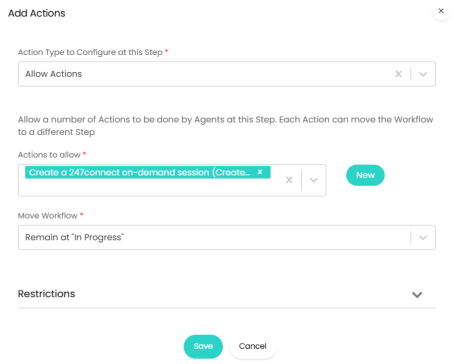
From the Action Type to Configure at this Step drop-down, select Allow Actions.
-
Configure the following settings:
Actions to allow: Select the Create on-demand session action created earlier
Move Workflow: Remain at In Progress
-
Click Save to save the stage configuration.
-
Scroll down and click Save.
-
On the Incident Management Workflow page, click Save again to save the workflow.
Note: Both the stage configuration and the workflow need to be saved. If either save is missed, the action will not be available in the workflow.
The workflow is now configured.
Configure ticket updates in HaloITSM (optional)
This configuration enables 247connect to add entries to HaloITSM tickets when on-demand sessions are created and ended.
Step 1 - Create a HaloITSM API application
-
In HaloITSM, go to Configuration > Integrations > HaloITSM API.
-
Click View Applications, then click New.
-
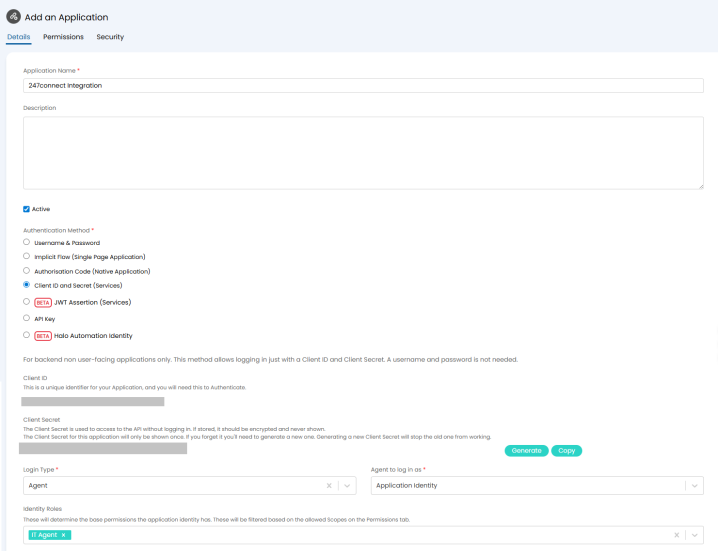
In the Details tab, configure the following settings:
Application Name: 247connect Integration
Active: Enabled
Authentication Method: Client ID and Secret (Services)
Login Type: Agent
Agent to log in as: Application Identity
Identity Roles: IT Agent or another role that has permission to update tickets.
-
Copy the generated Client ID and Client Secret and store them securely.
Note: The client secret is only shown once. After saving, it cannot be viewed again unless you generate a new secret. -
Select the Permissions tab.
-
Configure the minimum permissions required by the integration. Typical permissions include:
-
read:tickets
-
edit:tickets
-
-
Click Save.
Note: Ensure you click Save before leaving the page.
The Halo API application is now created.
Step 2 - Record the HaloITSM API details
-
Go to Configuration > Integrations > HaloITSM API.
-
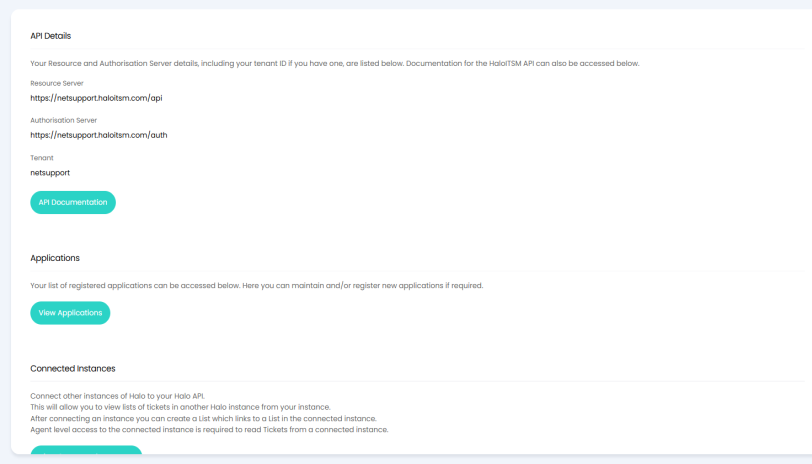
Record the following values displayed at the top of the page:
-
Resource Server
-
Authorisation Server
Example:
Resource Server: https://yourinstance.haloitsm.com
Authorisation Server: https://yourinstance.haloitsm.com/auth
-
You will need these values when configuring 247connect.
Step 3 - Create the action
-
Go to Configuration > Tickets > Actions.
-
Click New.
-
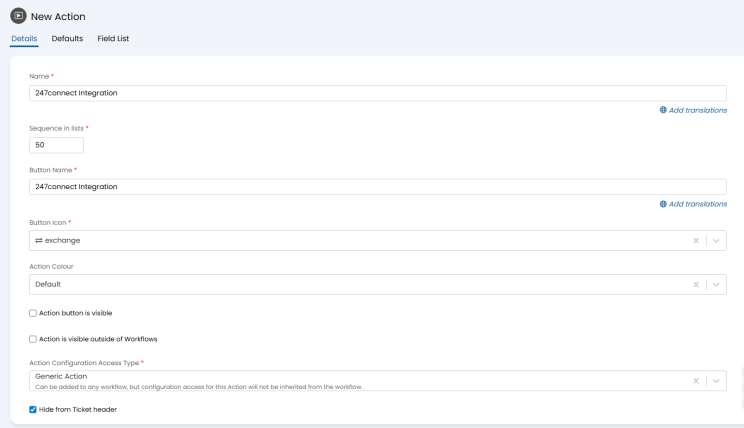
In the Details tab, configure the following:
Name: 247connect Integration
Sequence in list: A value of your choice, for example, 1
Button Name: 247connect Integration
Button Icon: Optional. Select a button icon, such as exchange, if required
Action Colour: Optional. To use the 247connect
Action button is visible: Disabled
Action is visible outside of workflows: Disabled
Hide from ticket header: Enabled
-
Scroll to Action Settings.

-
Configure the following setting:
System Use: Add CRM Note
-
Click Save.
Note: Ensure you click Save before leaving the page.
The ticket action is now created.
Step 4 - Configure the 247connect settings
-
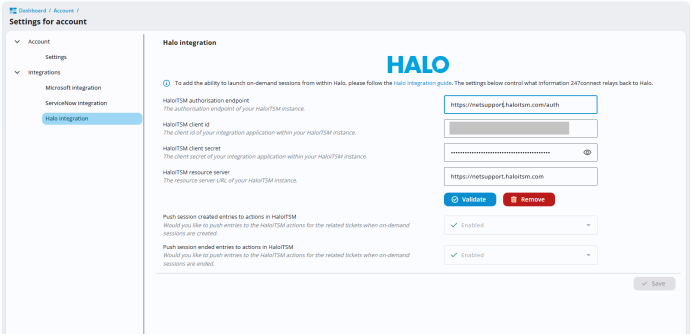
In the 247connect Web Portal, go to Account > Settings > Integrations > Halo integration.
-
Enter the following:
-
HaloITSM authorisation endpoint (e.g. https://yourinstance.haloitsm.com/auth)
-
HaloITSM Client ID
-
HaloITSM Client Secret
-
HaloITSM resource server (e.g. https://yourinstance.haloitsm.com)
-
-
To check the connection and confirm that the credentials are correct, click Validate.
Note: You can also control which session entries 247connect sends to HaloITSM from here. -
Click Save.
Use the on-demand session button
After setup, you can create a 247connect on-demand session directly from a HaloITSM ticket.
Start a session
-
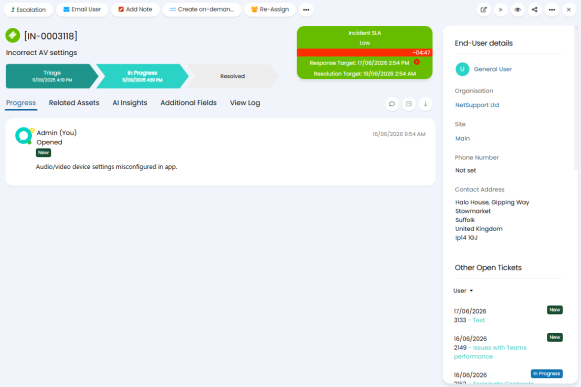
Open a ticket in HaloITSM.
-
Click Create on-demand session (or the name you configured).
-
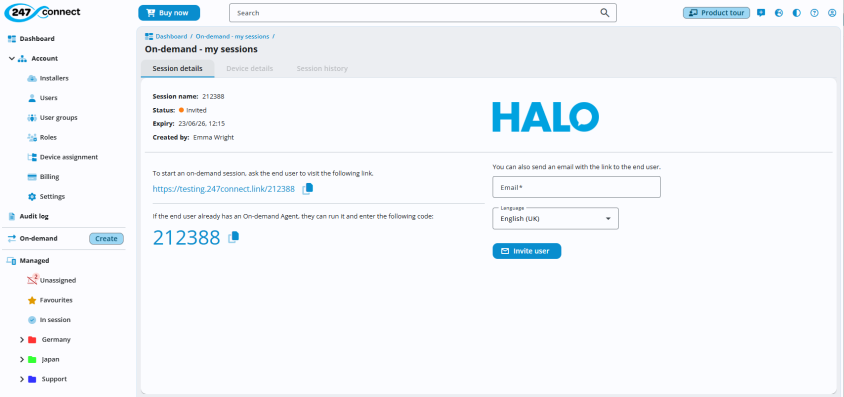
The 247connect Web Portal opens.
-
An on-demand session is created automatically.
-
Start the on-demand session with the end user.
-
When you finish the session, click Back to HaloITSM.
If session updates are enabled, session activity is automatically added to the HaloITSM ticket history.